Creating Spaces
Spaces are the discussion areas inside your community - each one has its own topic listing, member list, and settings. This guide shows you how to create, configure, and manage them.
What You Will Learn
- What spaces are and how they relate to categories
- Every field on the space creation form
- How the space header looks on the frontend
- How to edit and archive an existing space
What Is a Space?
A space is a focused discussion area organized around a single topic or purpose. Examples: a "General Discussion" space, a "Product Feedback" space, a "Help & Support" space.
Every space belongs to a category. Categories are the top-level groupings (like tabs or sections) that members see on the community home page. A space without a category will not appear in the community navigation, so set your categories up first. See Categories for how to create and organize them.
Tip: Plan your space structure before creating anything. Too many spaces fragment your community early. Start with three to five and add more as demand grows.
Creating a Space
You have two ways to create a space, depending on who needs to do it:
- wp-admin path (admins): Go to Jetonomy → Spaces in your WordPress dashboard and click Add New Space.
- Front-end path (anyone you choose): Visit
/community/new-space/while signed in. This page is available to any user role you've allowed under Settings → Front-end space creation, so you can let space owners or moderators create spaces without giving them wp-admin access. See Creating Spaces From the Front End for the full walkthrough.
Both paths show the same fields and produce the same result. The rest of this section describes each field.
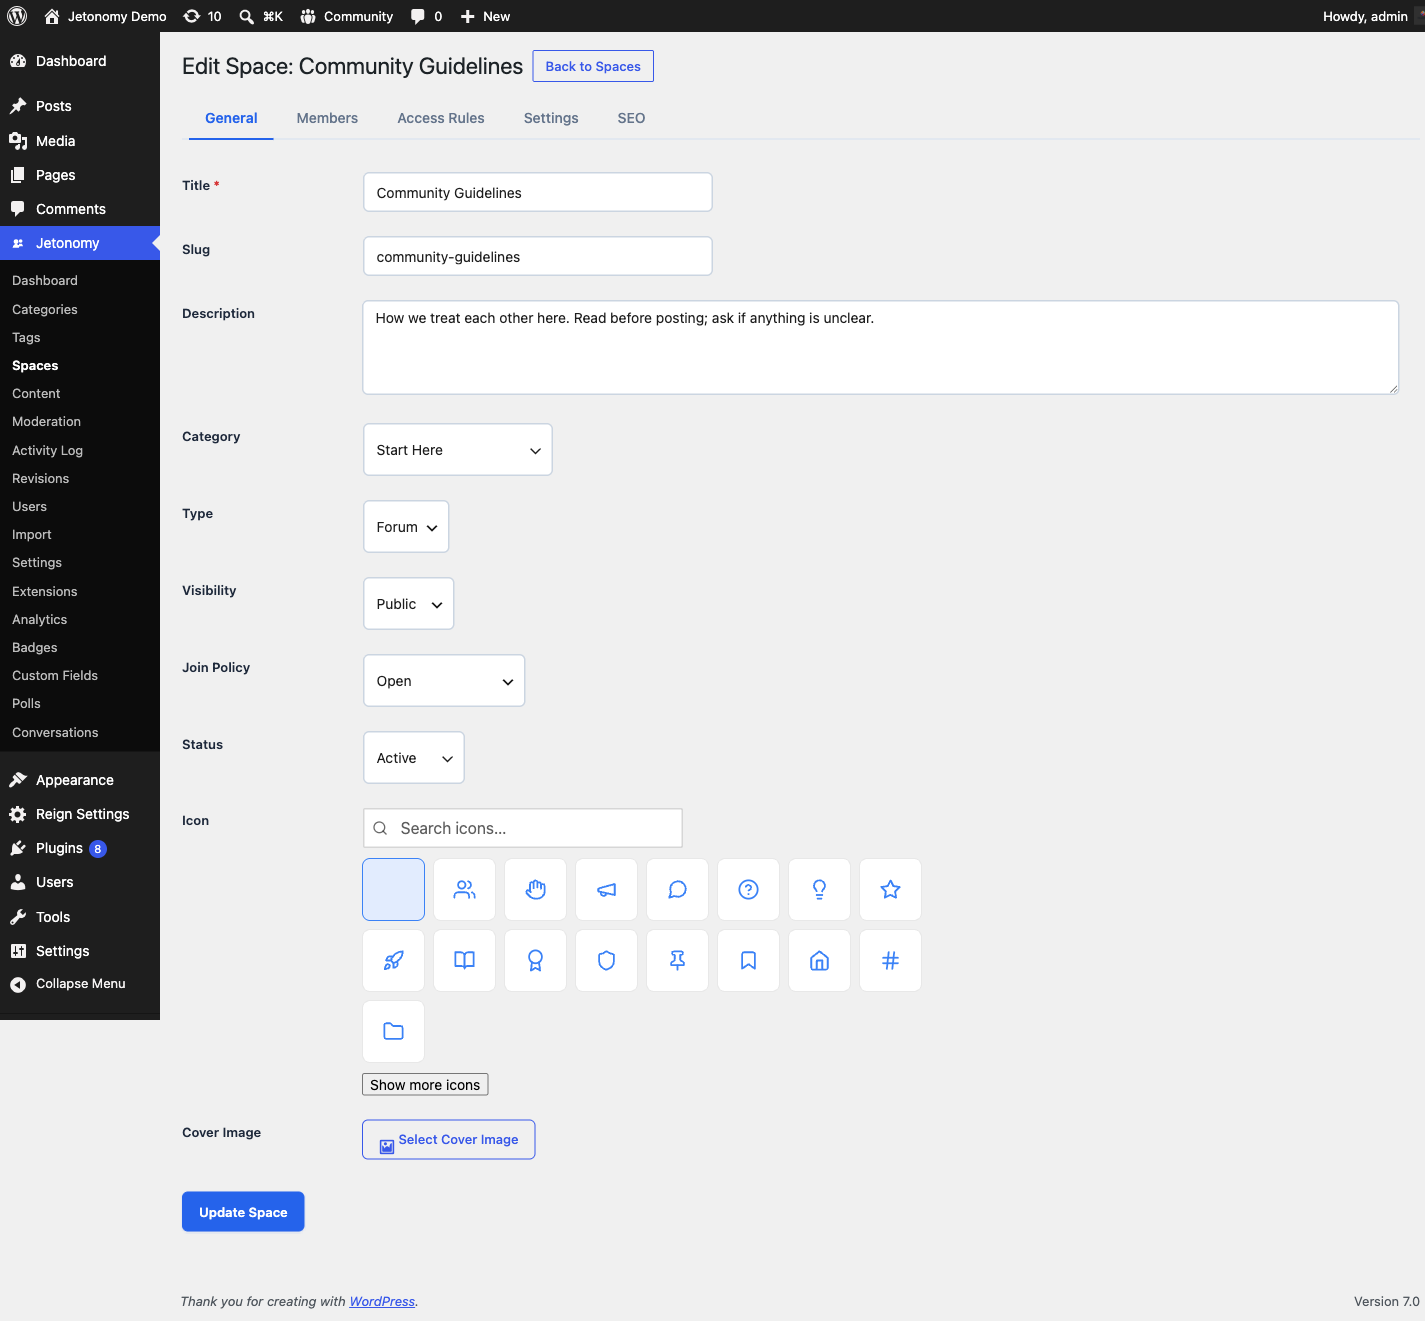
Basic Information
Title - The name members see in listings, the space header, and breadcrumbs. Keep it short and descriptive.
Slug - The URL-safe identifier for this space. Jetonomy auto-generates a slug from the title. The final URL will be /community/s/your-slug/. You can change the slug, but doing so after posts exist will break any existing links.
Description - A short sentence or two explaining what this space is for. This appears in the space header below the title and in category listing cards. It also populates the meta description for search engines.
Icon - The space icon is selected from Jetonomy's built-in Lucide icon picker (16 default icons plus 8 extras revealed by the "Show more" button, plus a search field to find any other Lucide name). The chosen icon appears in the space header and on category listing cards alongside the title. Icons render as crisp SVGs at every size, so they read clearly on mobile.
Category - Select which category this space belongs to. A space must be assigned to a category to appear on the community home page.
Space Configuration
Type - Choose Forum, Q&A, or Ideas. This controls how posts and replies behave. See Space Types for a full explanation of each.
Visibility - Controls who can see the space and its content. Options: Public, Private, or Hidden. See Membership & Join Policies for details.
Join Policy - Controls how members gain access. Options: Open, Approval Required, or Invite Only.
Defaults: if you leave Visibility and Join Policy untouched, a new space is Public + Open - anyone can find, read, and join it. Change them for private or invite-only spaces. Note that Hidden visibility always forces Invite Only; see Membership & Join Policies.
Click Save Space to publish it immediately.
The Space Header (Frontend)
Every space has a header at the top of /community/s/your-slug/ showing:
- The Lucide icon at large size
- The space title and description
- A stat bar with total post count, member count, and last activity time
- A Follow button for logged-in users (subscribes them to new post notifications)
- A Join button when the space requires membership
Members who have already joined see the Join button replaced with their role badge (Member, Moderator, or Admin).
Editing a Space
Two paths, same fields:
- wp-admin: Go to Jetonomy → Spaces, find the space in the list, and click Edit.
- Front end: Visit the space at
/community/s/your-slug/while signed in as a space owner / moderator and click the Edit space button in the space header. See Editing Spaces From the Front End for screenshots.
All fields are editable from either path, including the type and visibility settings.
Note: Changing the space type after content exists does not reformat old posts. Existing posts keep their original structure. Only new posts use the new type's behavior.
Archiving a Space
To archive a space, open it for editing and set its Status to Archived. An archived space becomes read-only - members can read existing posts and replies, but cannot create new ones. The space remains visible in listings with a clear "Archived" label.
Archived spaces do not count toward activity stats on the community home page.
To permanently remove a space, click Delete in the space list. This action also deletes all posts, replies, votes, and member records inside that space. It cannot be undone.
What's Next?
Learn how each space type changes the way posts and replies behave.